Routing Form
Routing forms feature allows you to direct clients to specific team members, meeting types, external URLs, or a custom message based on various parameters, such as industry, company size, or specific interests.
By using Routing forms, you can enhance your client experience, increase conversions, and efficiently collect client details, all while reducing the time it takes to connect clients with the right team member.
Key Benefits of Routing Forms
- Increase Conversions and Customer Satisfaction: Direct clients to the most relevant resources, improving their experience.
- Efficiently Collect Client Details: Gather important information seamlessly as clients fill out the form.
- Reduce Time to Connect: Ensure clients are matched with the right team member quickly and easily.
Please note:
Routing forms feature is available to users on paid plans at all times.
The user with any access level can create routing forms but the meeting types they can select for the destinations depends on the current rights.
How to Create a Routing Form
Navigate to the Integrations & Plugins tab -> in User integrations click Enable Routing forms plugin.
Once it’s enabled you can also find it under the Meeting types -> Routing forms.
Step 1: Build an Intake Form
1. Click on: Create New Routing form button.
2. Name Your Form: Enter a name for the routing form (for internal usage only).
3. Optionally: Add a header, and description, change the button text.
4. Add Questions:
- Select a question format (choose from multiple formats available).
- Decide if you’d like to make the question required.
- Click “Save” to save your question or click the “Close” button to dismiss the question.
- Click “Preview” to check if you are happy with your form.
- Click “Next” if you are ready to move on to the next step.
Step 2: Set Up Your Routing Logic
(This step determines where clients will be directed based on their answers).
For Matching Answers:
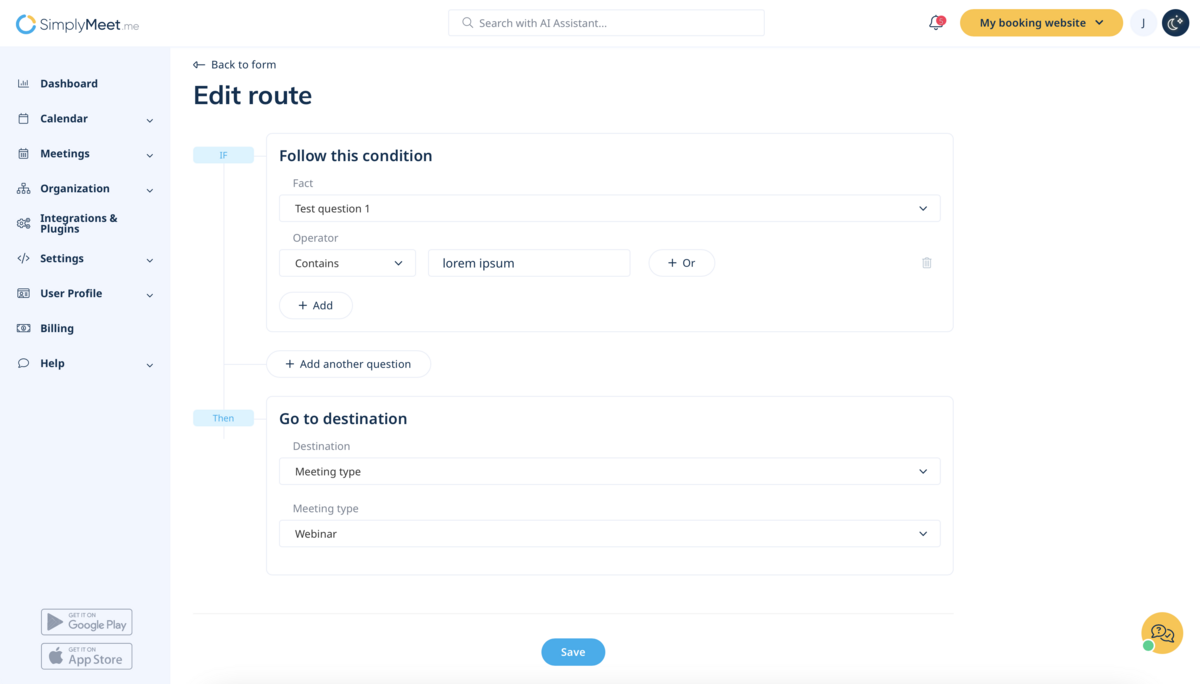
1. Click "+Add route" and add a name to your route (for internal usage only).
2. Choose the question from the drop-down menu and select the preferred answer.
3. Click "+" to offer more than one answer for the same question.
4. Click "+Add another question" to add additional logic for other question.
5. Select one of the routing options:
- Custom message
- Meeting type
- External URL
6. Click "Save" when ready.
7. To add another route, select "+ Add route".
For Non-Matching Answers:
1. Click "In all other cases route to".
2. Select a "Custom message".
3. Edit the template for this custom message.
4. Click "Save" when finished.
Step 3: Publish and Preview Your Form
Once you’ve set up your form and routing logic, click “Publish form”.
Step 4: Share Your Form Link
After publishing, you can share your Routing Form link with clients. This makes it easy for them to access and fill out the form.
Viewing Responses
After a Routing Form submission, you can view the responses and the final routing destination for each submission in the Results tab.


