Custom Domain
Your scheduling page is available through simplymeet.me by default. Your URL will look like this: simplymeet.me/testsmaccount
Note: This is a Paid plan feature.
If you’d like to use a different URL, you can create one by setting up a custom domain. You can do so by:
1. Enter your custom domain
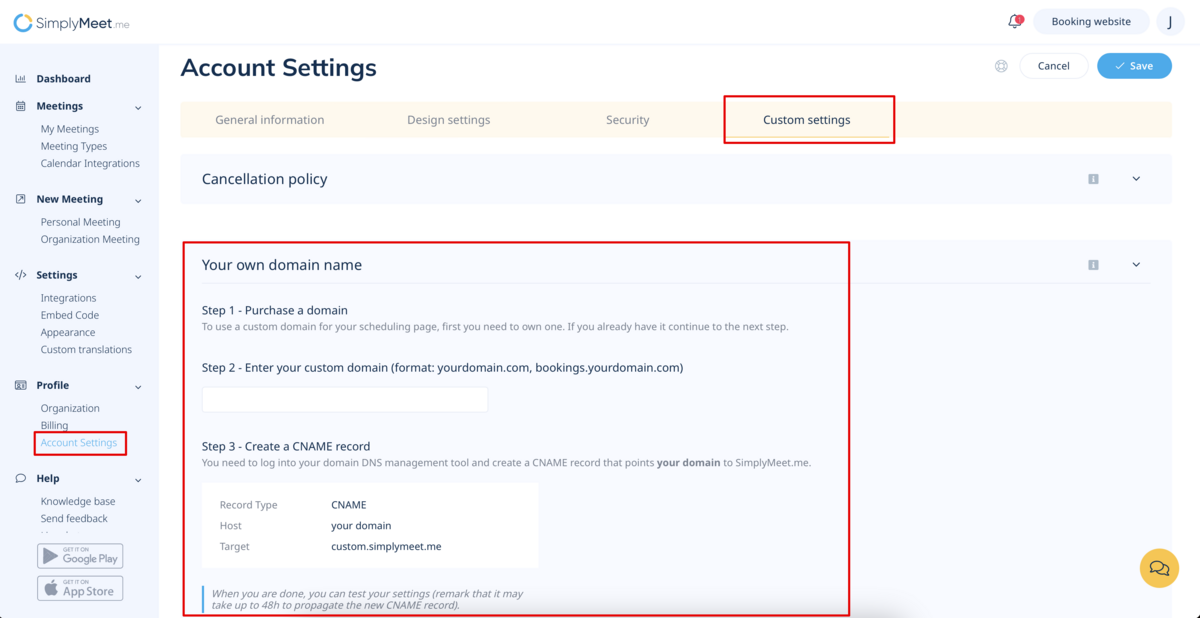
If you are setting custom domain on the user level - please enter the custom domain you want to use in your Account Settings -> Custom settings -> Your own domain name.
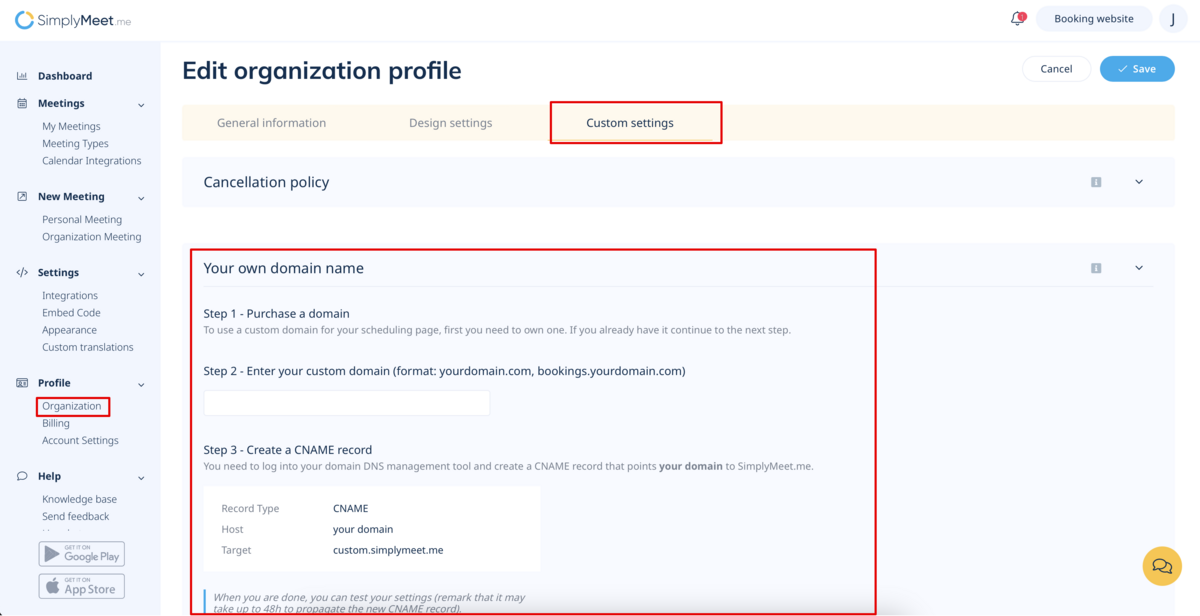
If you are setting custom domain on the organization level - please navigate to Organization settings page -> Custom settings -> Your own domain name
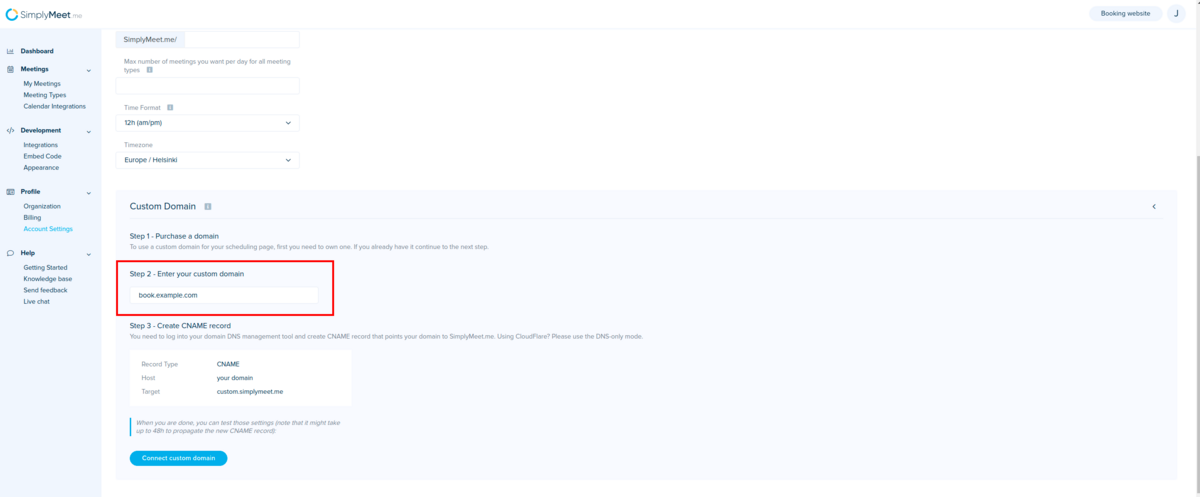
Let’s use "book.example.com" as an example:
2. Create a custom CNAME record
1. Go to your DNS provider’s website (e.g. GoDaddy or Cloudflare).
2. Create a CNAME ("canonical name") record for your custom domain you entered in the Account Settings area of your SimplyMeet.me Custom Domain setting: https://secure.simplymeet.me/profile/edit (as displayed in the screenshot above it will be book.example.com in this case).
Whatever you enter in "Enter your custom domain" field will be your domain you have to add a CNAME record for.
3. Point it at SimplyMeet.me host domain:
custom.simplymeet.me.
A custom domain will be automatically secured with Let's Encrypt SSL certificate. There is no need to install the SSL certificate yourself.
3. Test your connection
If everything will be properly configured you can test your CNAME configuration by clicking on the green "Test" button.
Note that CNAME record changes can take up to 24 hours to go into effect, but usually it's faster.
Cloudflare troubleshooting
If you are using Cloudflare, your SSL/TLS encryption mode can be set to Off or Full. Make sure the Always Use HTTPS is disabled.
The DNS CNAME record must be set to
DNS only


