Is it possible to take payment for the scheduled meetings
Thanks to our SBPay integration you can accept payments for the booked meetings with PayPal, Stripe, Adyen and many other processors.
How to Enable SBPay
- Navigate to the Integrations & Plugins section of your account dashboard.
- Locate the SBPay for User plugin and click Enable if you plan to use it for the single account. Or enable SBPay for Organisation if you are an owner of the organization.
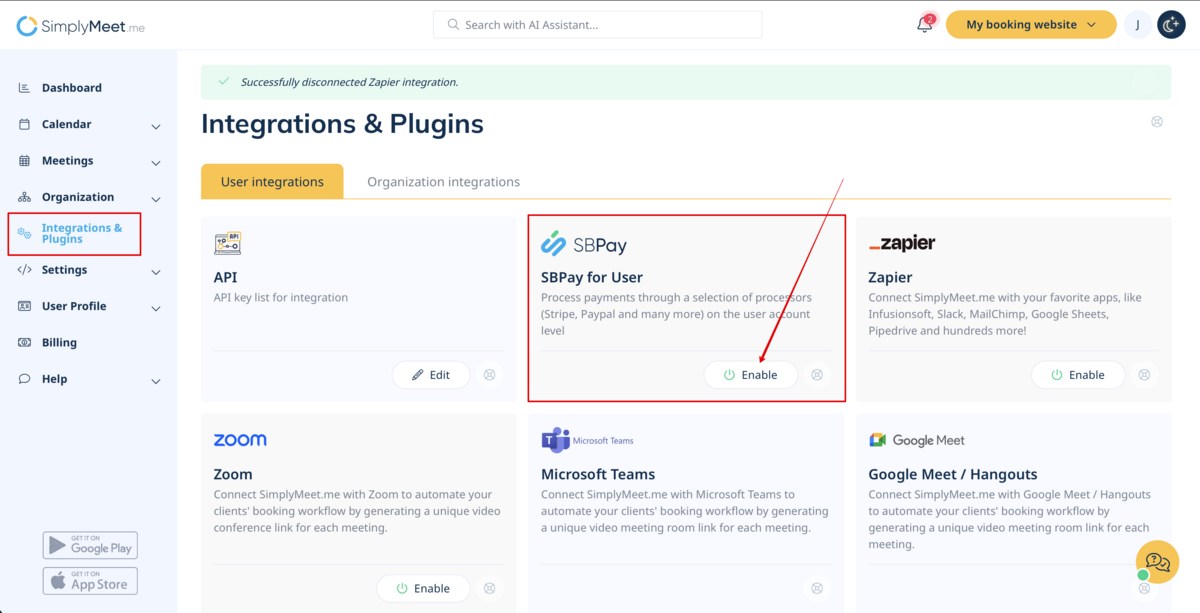
- Fill in the required fields and submit.
- Navigate to Payment Settings and add your preferable payment processor credentials (Stripe, PayPal, etc.)
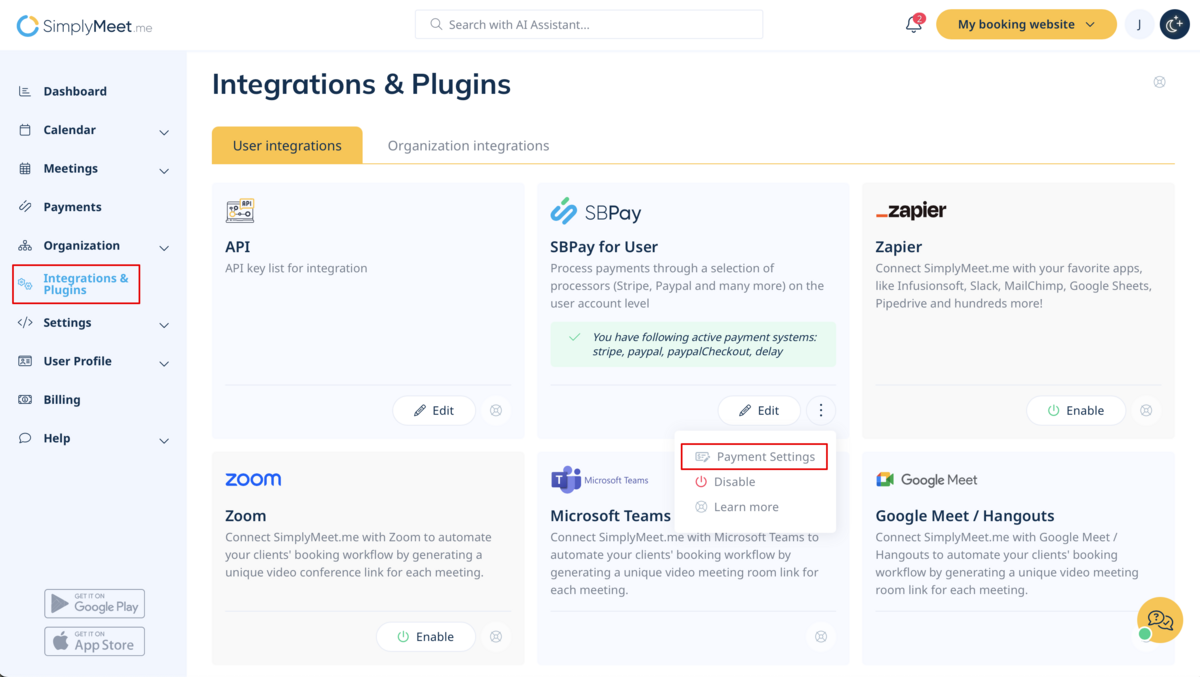
Where to Set Prices and Change Currency
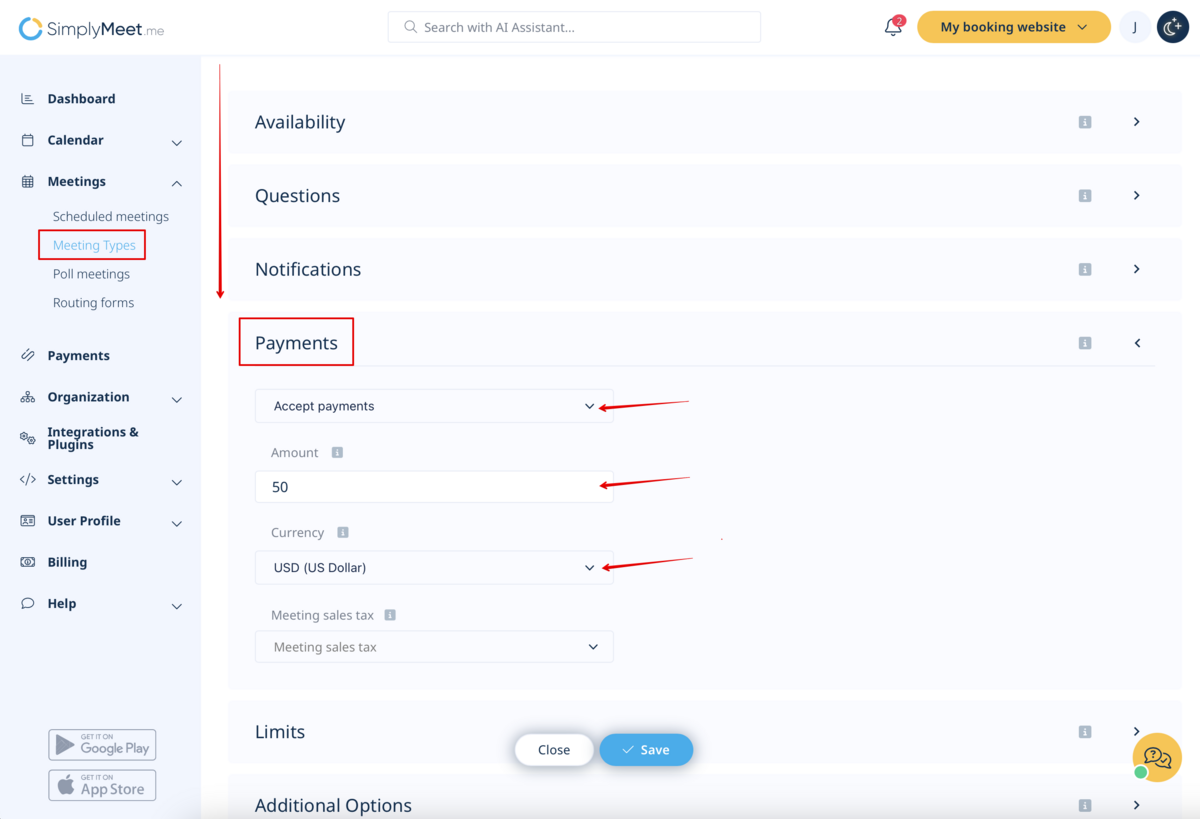
- Go to Meeting types > select the specific meeting type > Payments > select Accept Payments from a drop-down.
- Under each meeting type set the Price (Amount) and Currency in the relevant field.
- Save changes to apply pricing to client bookings.
How to Add Taxes
- In the Integrations & Plugins > SBPay for User or SBPay for Organization > Edit > + Add new tax
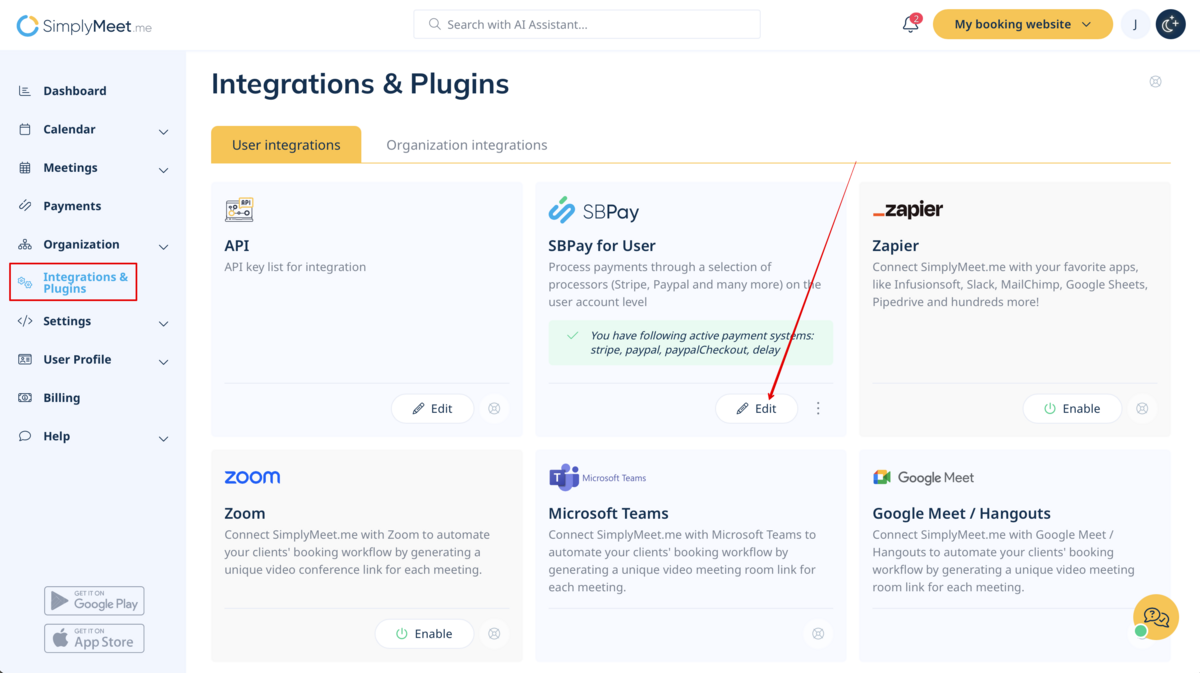
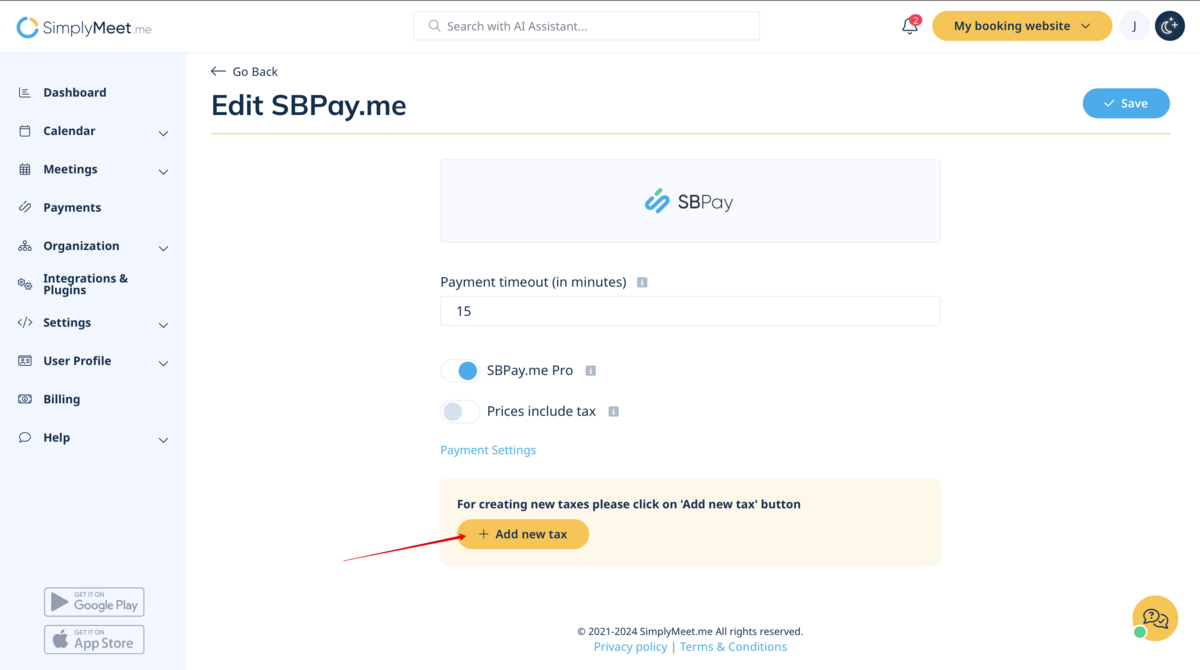
- Configure applicable taxes, ensuring compliance with your local regulations.
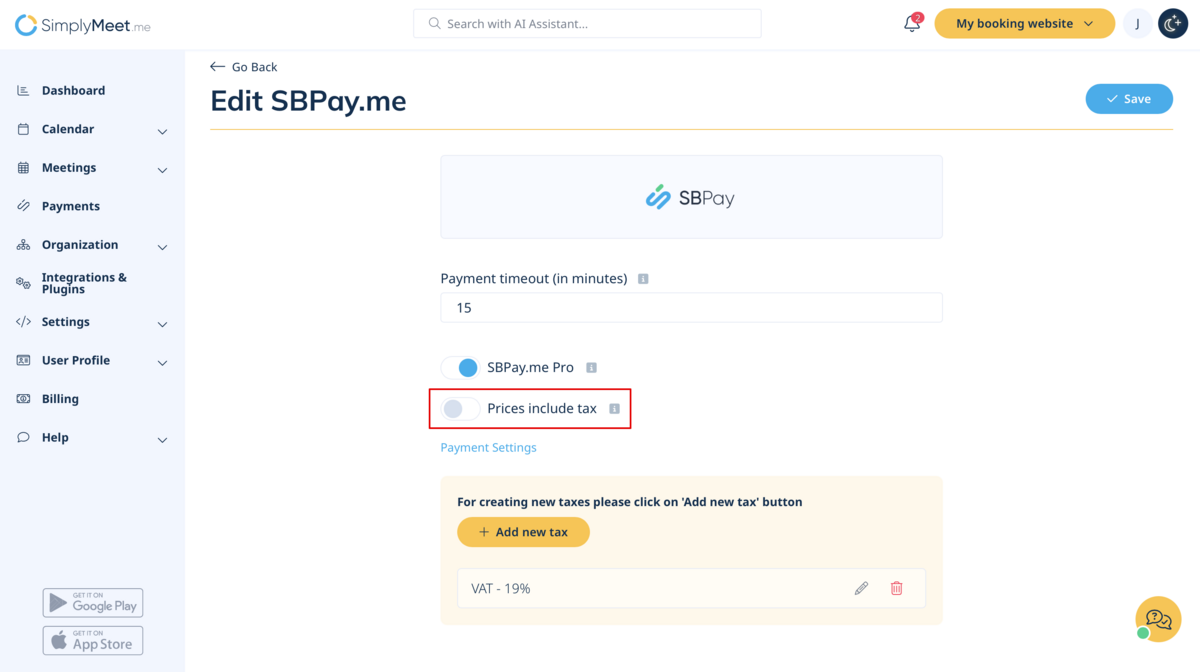
- Once the taxes are configured you can decide whether tax is included into the meeting type price or will be added on top of the amount that you have indicated as a price. Please use the option Prices include tax on the same page. When it is enabled the taxes will be included in prices on the booking site. If disabled the tax will be added on top at checkout.
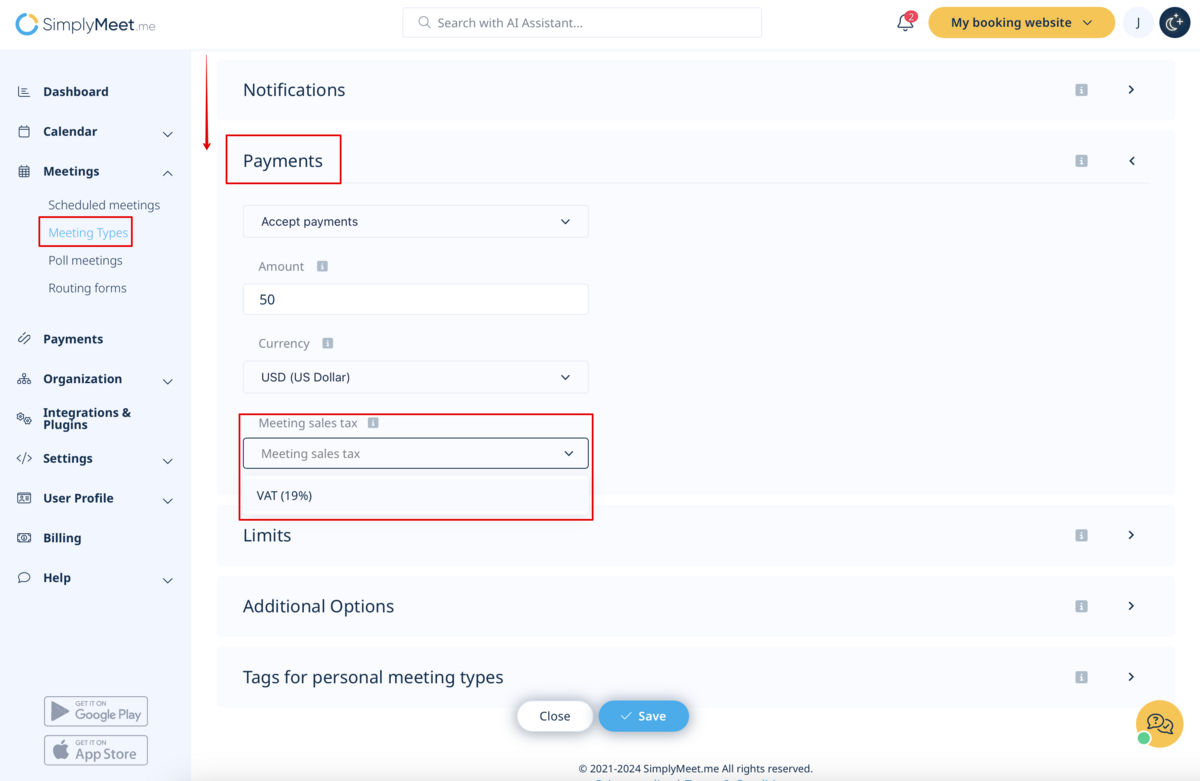
- Then go to Meeting Types > select the specific meeting type > Payments > select the neceesary tax from the corresponding drop-down menu. Save settings.
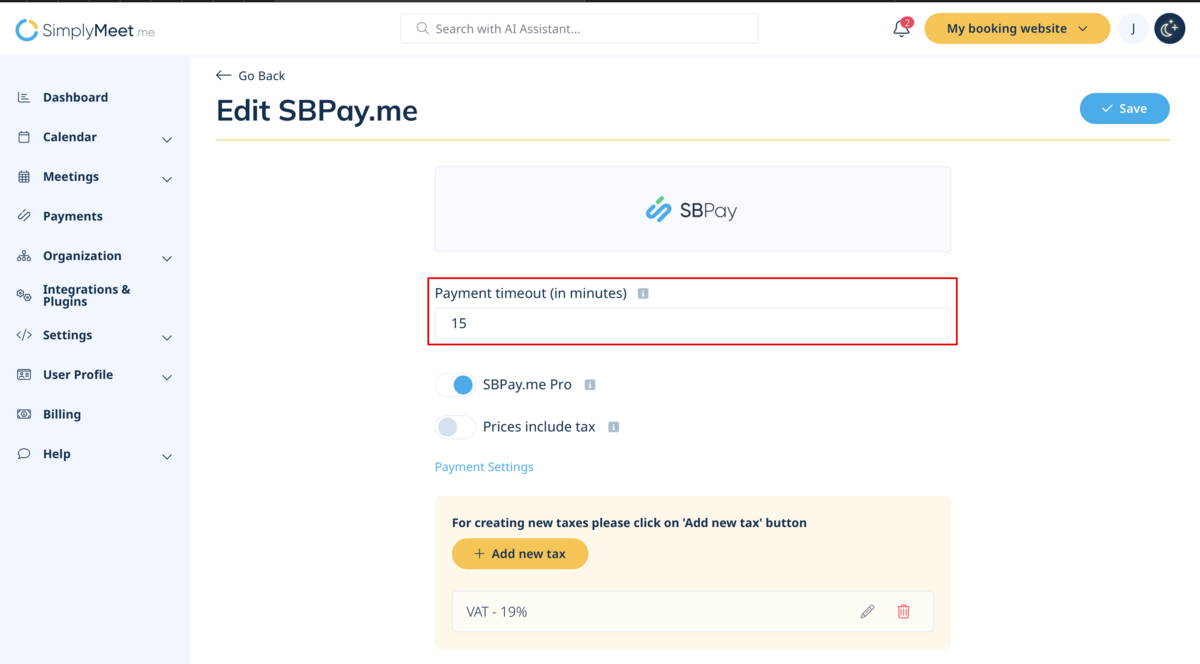
Payment Timeout
This setting allows to determine the duration within which a payment transaction must be completed before it expires. If not paid within the defined period, the associated transaction and booking/s will be canceled automatically.
The recommended period is at least 1 hour to give clients enough time to complete the payment and for the payment system to send us the confirmation.
Go to Integrations & Plugins > SBPay for User or SBPay for Organization > Edit > type in your desired Payment timeout (in minutes).

What is "Pay later" option
When your clients are on the Meeting details page of your booking website they usually have several options: your payment processor (one or several) and Pay Later. Pay Later in most cases means that client will pay right at the place when he/she arrives at the appointment.
In your Meetings > Scheduled meetings such booking will have the status "Not completed". Additionally, you can click on the three dots menu next to this booking and select “View in SBPay.me”.
If you want to disable Pay later option please navigate to Integrations & Plugins > SBPay for User or SBPay for Organization > Edit > inside the SBPay interface go to Payment processors > Pay later > Deactivate.
Payment request (link)
(available with Professional subscription (i.e. SBPay.me PRO version)
With this option you can now easily send payment links via emails or sms to your clients to pay onsite or offsite for some meetings.
Please watch the video on how to use it here.
Refunds
(available with Professional subscription (i.e. SBPay.me PRO version)
It may happen that you need to give the money back to your customer due to some reason and now it is possible to easily manage such cases with SBPay.me Pro integration.
- After you activate SBPay.me integration in your account you can simply navigate to SBPay interface > Payments > find the necessary payment and under the Actions in a drop down menu click Refund. Confirm the action and the refund will be automatically made to the corresponding client's account(unless it was made via wire transfer, etc.).
How to customize the client invoices
You can now easily adjust the invoices settings to your needs and send them to your customers after any purchase.
- How to use
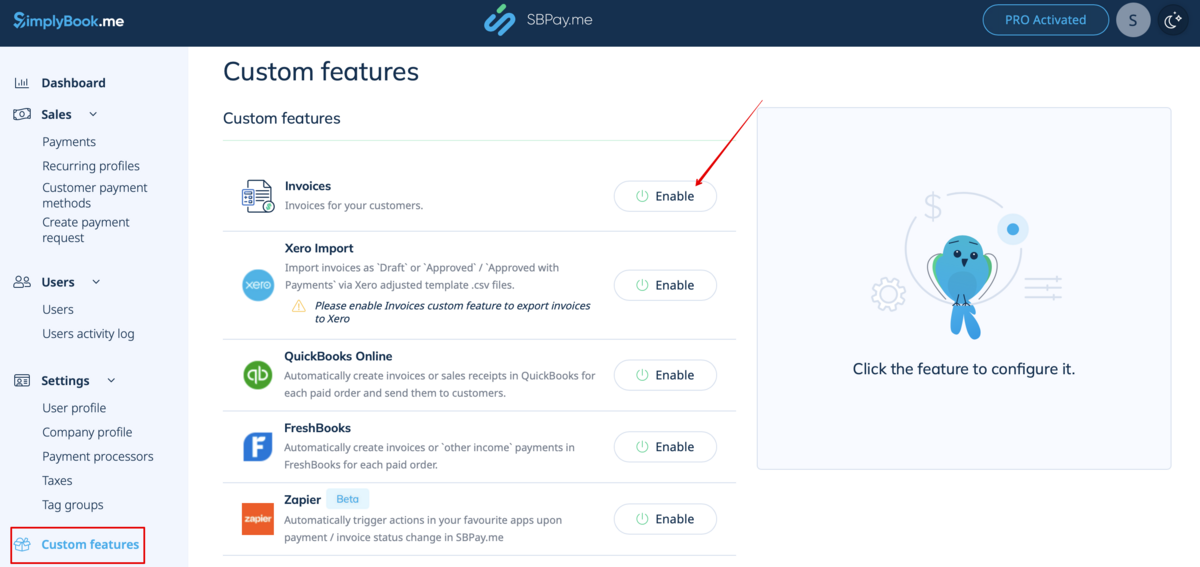
1. Navigate to SBPay.me interface from Integrations & Plugins > SBPay for User or SBPay for Organization > Payment settings.

2. Enable the corresponding option on your "Custom features" page.
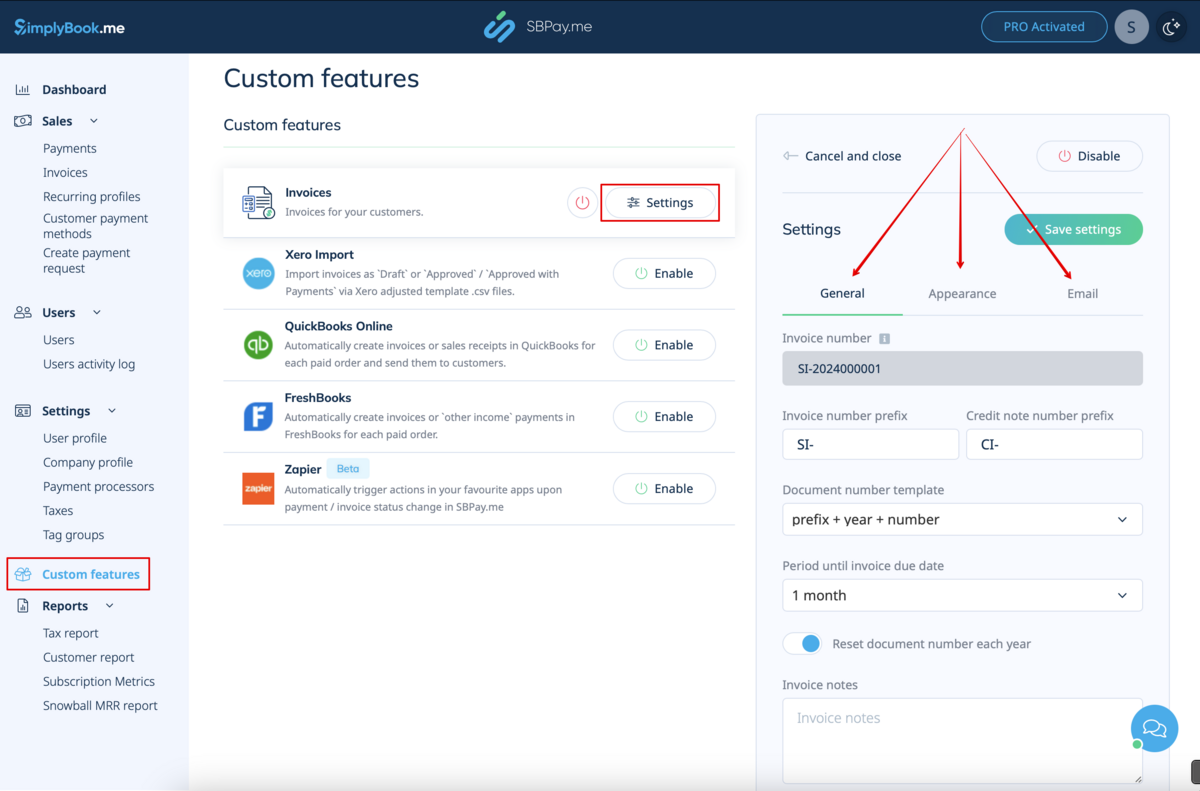
3. Adjust the general settings to your needs: the invoice and credit note numbering format, add notes, link to your Terms and Conditions and footer information if necessary.
4. Set the desired look in "Appearance" tab, upload your company logo.
5. Switch to the third, "Email", tab and set the notifications templates. You can use several variables mentioned below the form. save your settings.
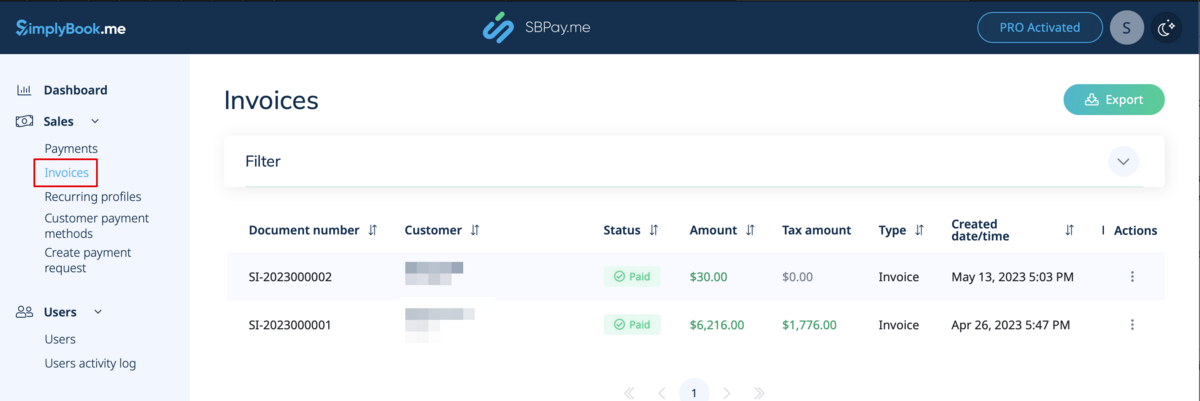
6. In the Sales -> Invoices you can see the list of created invoices and credits notes. You can resend them to the clients when needed, issue credit notes, print or simply view the details.
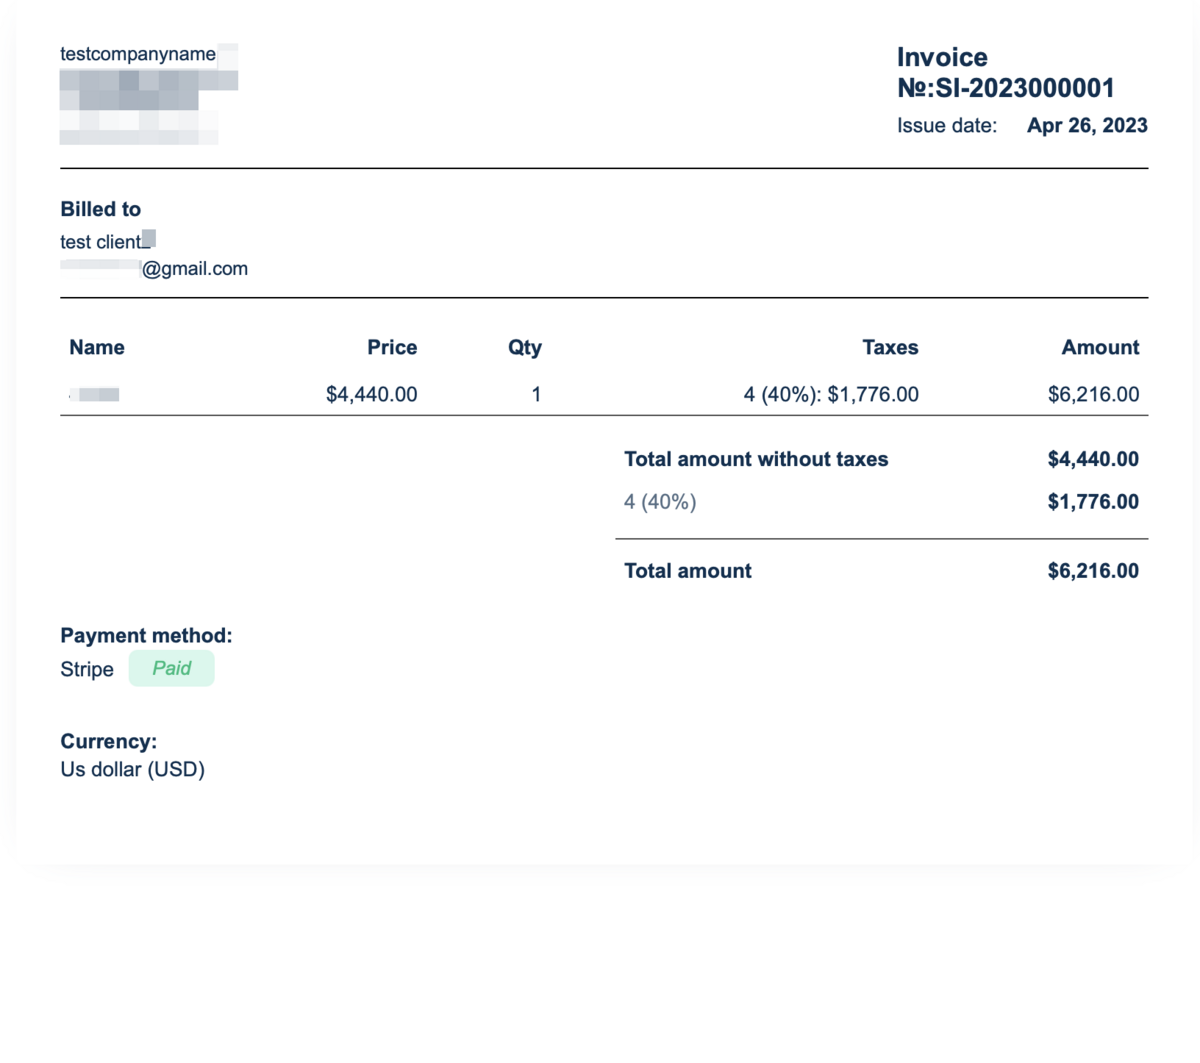
7. Here is the example of how print invoice version can look like.
Please note! Importing invoices from external platforms directly into the system is not supported. However, SBPay.me offers integration options with various accounting software, including Xero, QuickBooks, and FreshBooks. You can efficiently manage your invoices within your preferred accounting system.
How the whole payments process works
1. A client goes through the scheduling process, fills in the required fields, selects the preferable payment method (from the ones you have made available) and presses "Schedule & Pay" at the end.
2. He is directed to the payment processor step/side (depending on the payment system).
At this stage unconfirmed booking appears in the admin calendar marked red as "Not completed" to reserve this time so that no other person can accidentally book the same slot and there will be no double-bookings. As well an order with the "New" status appears in "Payment transactions" report in SBPay.me system.
3. After that, the client has 2 options:
- 3.1. to pay and the payment processor will send us confirmation that client has paid and we will automatically approve the transaction on our side (booking will be marked with green color and "Active" status, the order will get "paid" status).
- 3.2. to not finish paying: the client is directed to the payment system, but then he closes the page, closes the browser, or simply leaves it open without any actions for a long period of time. In this case, the system will wait until timeout you set up in the settings of SBPay custom feature will end and will cancel the non-paid booking/transaction because it was never finished.
- 3.1. to pay and the payment processor will send us confirmation that client has paid and we will automatically approve the transaction on our side (booking will be marked with green color and "Active" status, the order will get "paid" status).
Same happens if the client paid, but paid later than timeout. In this case, if you receive a notification from PayPal/Stripe/etc. that client paid for the booking/order but as it was too late you can go to Scheduled meetings > View in SBPay.me or inside the SBPay interface > Sales > Payments > in your SimplyMeet.me account and confirm that the payment was received manually.