No edit summary |
No edit summary |
||
| Line 12: | Line 12: | ||
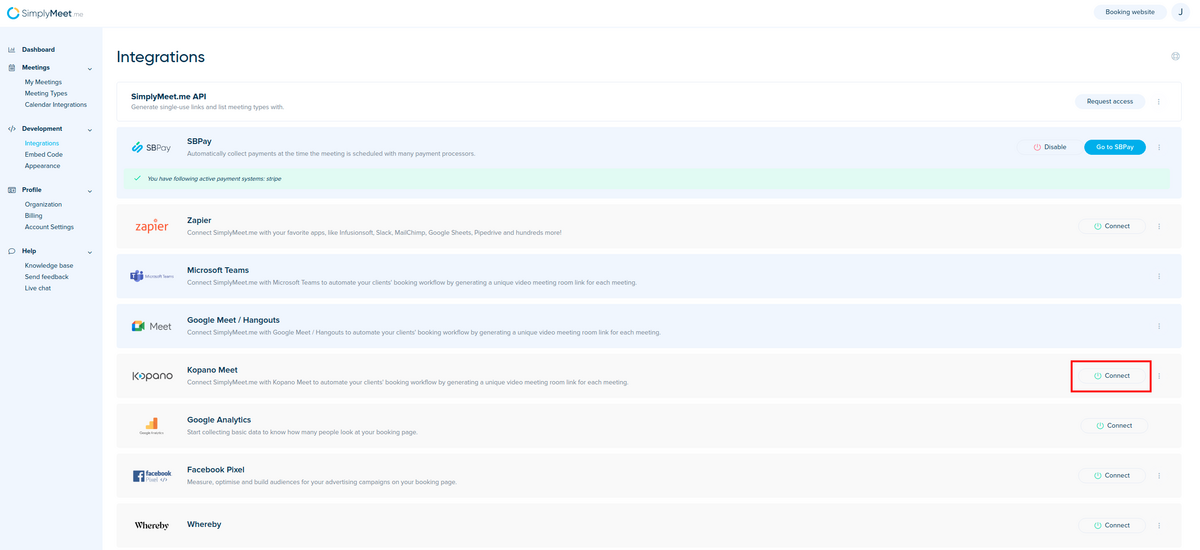
2. Click the <strong>Connect </strong>button in Kopano Meet integration section.<br> | 2. Click the <strong>Connect </strong>button in Kopano Meet integration section.<br> | ||
<div class="intercom-container"> | <div class="intercom-container"> | ||
[[File: | [[File:Simplymeet kopano meet path.png|1200px|center]] | ||
</div> | </div> | ||
<p class="no-margin"> | <p class="no-margin"> | ||
3. <strong>(optional) </strong>If you are using the Kopano Meet self-hosted installation, use your own instance URL, otherwise, leave it as it is. The default [https://use.meet-app.io https://use.meet-app.io] Kopano Meet instance will be used. | |||
</p> | </p> | ||
<p class="no-margin"> | <p class="no-margin"> | ||
</p> | </p> | ||
<div class="intercom-container"> | <div class="intercom-container"> | ||
[[File: | [[File:Simplymeet kopano meet setup.png|1200px|center]] | ||
</div> | </div> | ||
<p class="no-margin"> | <p class="no-margin"> | ||
4. Click <strong>Connect</strong> button.<br> | |||
5. In your [https://app.simplymeet.me/event_types Meeting Types], choose the <strong>Create a Kopano Meet meeting link </strong>option from the <strong>Location </strong>dropdown. | |||
</p> | </p> | ||
<div class="intercom-container"> | <div class="intercom-container"> | ||
[[File: | [[File:Simplymeet kopano meet as location.png|1200px|center]] | ||
</div> | </div> | ||
<p class="no-margin"> | <p class="no-margin"> | ||
6. Now, when someone schedules a new meeting with you, the Kopano Meet video meeting link will be automatically generated. | |||
</p> | </p> | ||
<p class="no-margin"> | <p class="no-margin"> | ||
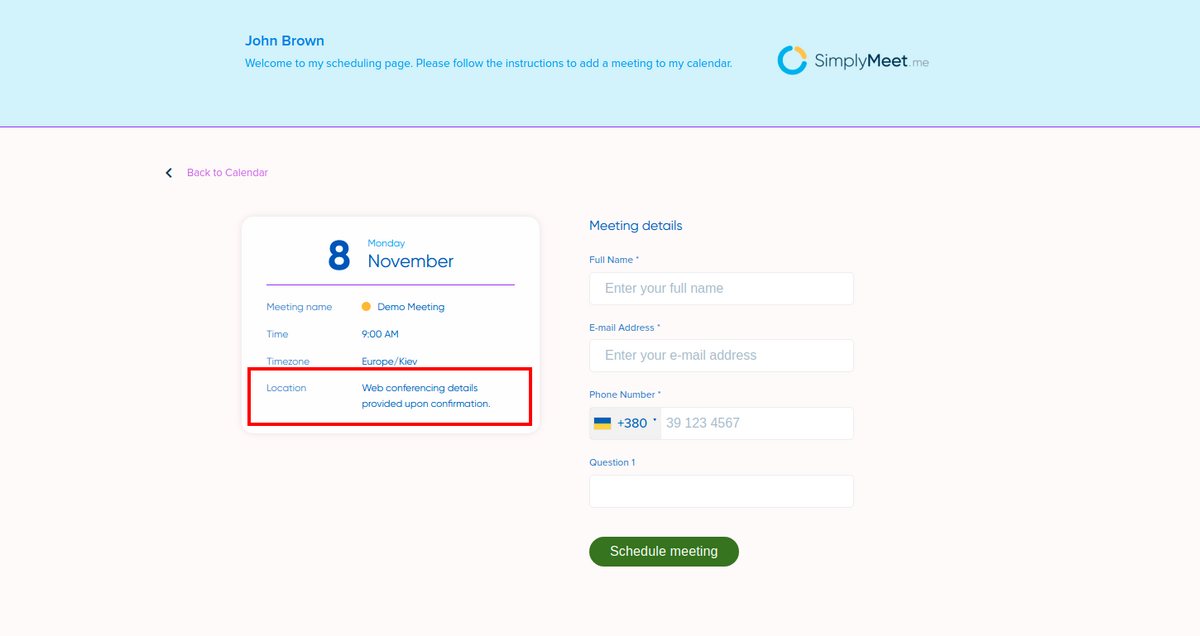
When Kopano Meet integration is enabled and | |||
<strong>Create a Kopano Meet meeting link </strong>option from the <strong>Location</strong> dropdown in the Meeting Type is selected the <strong>Web conferencing details provided upon confirmation </strong>text will be visible in the Location details on the scheduling page. | |||
</p> | </p> | ||
<div class="intercom-container"> | <div class="intercom-container"> | ||
[[File: | [[File:Simplymeet client side web location.png|1200px|center]] | ||
</div> | </div> | ||
Revision as of 13:02, 4 November 2021
The Kopano Meet integration automates your clients' booking by generating a unique video meeting link for every meeting.
When a new meeting is scheduled with SimplyMeet.me, a Kopano Meet video meeting link is automatically created and added to the meeting details, calendar and email notifications.
Note: Kopano Meet integration is a Paid plan feature.
Getting started with Kopano Meet integration
1. Go to Integrations in SimplyMeet.me.
2. Click the Connect button in Kopano Meet integration section.
3. (optional) If you are using the Kopano Meet self-hosted installation, use your own instance URL, otherwise, leave it as it is. The default https://use.meet-app.io Kopano Meet instance will be used.
4. Click Connect button.
5. In your Meeting Types, choose the Create a Kopano Meet meeting link option from the Location dropdown.
6. Now, when someone schedules a new meeting with you, the Kopano Meet video meeting link will be automatically generated.
When Kopano Meet integration is enabled and Create a Kopano Meet meeting link option from the Location dropdown in the Meeting Type is selected the Web conferencing details provided upon confirmation text will be visible in the Location details on the scheduling page.


