No edit summary |
No edit summary |
||
| Line 1: | Line 1: | ||
<p class="no-margin"> | <p class="no-margin"> | ||
You can configure SimplyMeet.me to send email notifications to your invitees from your own domain. | You can configure SimplyMeet.me to send email notifications to your invitees from your own domain. | ||
</p> | </p> | ||
<p class="no-margin"> | <p class="no-margin"> | ||
We provide the SMTP server so all you have to do is to let us send emails using your domain by adding two DNS records to your domain settings. | We provide the SMTP server so all you have to do is to let us send emails using your domain by adding two DNS records to your domain settings. | ||
</p> | </p> | ||
<p class="no-margin"> | <p class="no-margin"> | ||
| Line 16: | Line 12: | ||
<h2 id="how-to-send-emails-using-your-own-domain">How to send emails using your own domain</h2> | <h2 id="how-to-send-emails-using-your-own-domain">How to send emails using your own domain</h2> | ||
<p class="no-margin"> | <p class="no-margin"> | ||
1. Go to your [https://app.harmonizely.com/profile/edit Account Settings].<br> | |||
2. In the <strong>Custom email sender </strong>section, type your custom email address | |||
</p> | </p> | ||
<p class="no-margin"> | <p class="no-margin"> | ||
| Line 28: | Line 22: | ||
<p class="no-margin"> | <p class="no-margin"> | ||
<br> | <br> | ||
3. Click <strong>Authorize </strong>button.<br> | |||
4. Two DNS records will show up | |||
</p> | </p> | ||
<div class="intercom-container"> | <div class="intercom-container"> | ||
| Line 38: | Line 29: | ||
</div> | </div> | ||
<p class="no-margin"> | <p class="no-margin"> | ||
5. Now, go to your domain's provider and in DNS settings set the following DNS records: | |||
</p> | </p> | ||
<p class="no-margin"> | <p class="no-margin"> | ||
| Line 46: | Line 35: | ||
</p> | </p> | ||
<p class="no-margin"> | <p class="no-margin"> | ||
Name: <strong>(this will be the name of the first DNS record from step 4.)</strong> | |||
</p> | </p> | ||
<pre> | <pre> | ||
20200210093413pm._domainkey | |||
</pre> | </pre> | ||
<p class="no-margin"> | <p class="no-margin"> | ||
Type: <strong>TXT</strong> | |||
</p> | </p> | ||
<p class="no-margin"> | <p class="no-margin"> | ||
Value: <strong>(this will be the value of the first DNS record from step 4.)</strong> | |||
</p> | </p> | ||
<pre> | <pre> | ||
k=rsa; p=MIGfMA0GCSqGSIb3DQEBAQUAA4GNADCBiQKBgQCI3U114ujVxqkFif... | |||
</pre> | </pre> | ||
<p class="no-margin"> | <p class="no-margin"> | ||
TTL: | |||
<strong>1h</strong><br> | |||
<br> | |||
<strong>Note</strong>: Make sure you use the exact values generated in step 4. The above records are only examples.<br> | |||
<br> | |||
<strong><em>Return-Path record</em></strong> | |||
</p> | </p> | ||
<p class="no-margin"> | <p class="no-margin"> | ||
Name: | |||
<strong>(this will be the name of the second DNS record from step 4.)</strong> | |||
</p> | </p> | ||
<pre> | <pre> | ||
pm-bounces | |||
</pre> | </pre> | ||
<p class="no-margin"> | <p class="no-margin"> | ||
Type: <strong>CNAME</strong> | |||
</p> | </p> | ||
<p class="no-margin"> | <p class="no-margin"> | ||
Value: <strong>(this will be the value of the second DNS record from step 4.)</strong> | |||
</p> | </p> | ||
<pre> | <pre> | ||
pm.mtasv.net. | |||
</pre> | </pre> | ||
<p class="no-margin"> | <p class="no-margin"> | ||
TTL: <strong>1h</strong> | |||
</p> | </p> | ||
<p class="no-margin"> | <p class="no-margin"> | ||
6. Click the <strong>Verify DNS settings</strong> button. | |||
</p> | </p> | ||
<div class="intercom-container"> | <div class="intercom-container"> | ||
| Line 121: | Line 83: | ||
</div> | </div> | ||
<p class="no-margin"> | <p class="no-margin"> | ||
It might take up to 24h to activate your custom email address. | |||
</p> | </p> | ||
<h2 id="are-you-using-cloudflare">Are you using Cloudflare?</h2> | <h2 id="are-you-using-cloudflare">Are you using Cloudflare?</h2> | ||
<p class="no-margin"> | <p class="no-margin"> | ||
Proxy status for both of the DNS records must be set to | |||
<strong>DNS only.</strong> | <strong>DNS only.</strong> | ||
</p> | </p> | ||
Revision as of 12:44, 23 August 2021
You can configure SimplyMeet.me to send email notifications to your invitees from your own domain.
We provide the SMTP server so all you have to do is to let us send emails using your domain by adding two DNS records to your domain settings.
Note: Email notifications using your domain will only be sent to your invitees. Email notifications sent to meeting hosts will be sent from our default email address (notifications at harmonizely.com).
How to send emails using your own domain
1. Go to your Account Settings.
2. In the Custom email sender section, type your custom email address
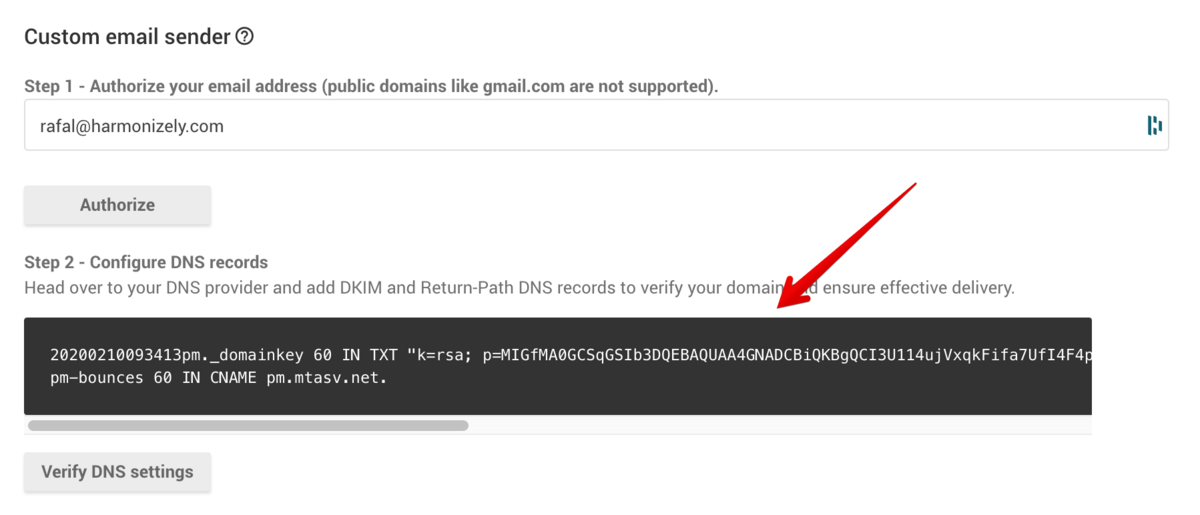
3. Click Authorize button.
4. Two DNS records will show up
5. Now, go to your domain's provider and in DNS settings set the following DNS records:
DKIM record
Name: (this will be the name of the first DNS record from step 4.)
20200210093413pm._domainkey
Type: TXT
Value: (this will be the value of the first DNS record from step 4.)
k=rsa; p=MIGfMA0GCSqGSIb3DQEBAQUAA4GNADCBiQKBgQCI3U114ujVxqkFif...
TTL:
1h
Note: Make sure you use the exact values generated in step 4. The above records are only examples.
Return-Path record
Name: (this will be the name of the second DNS record from step 4.)
pm-bounces
Type: CNAME
Value: (this will be the value of the second DNS record from step 4.)
pm.mtasv.net.
TTL: 1h
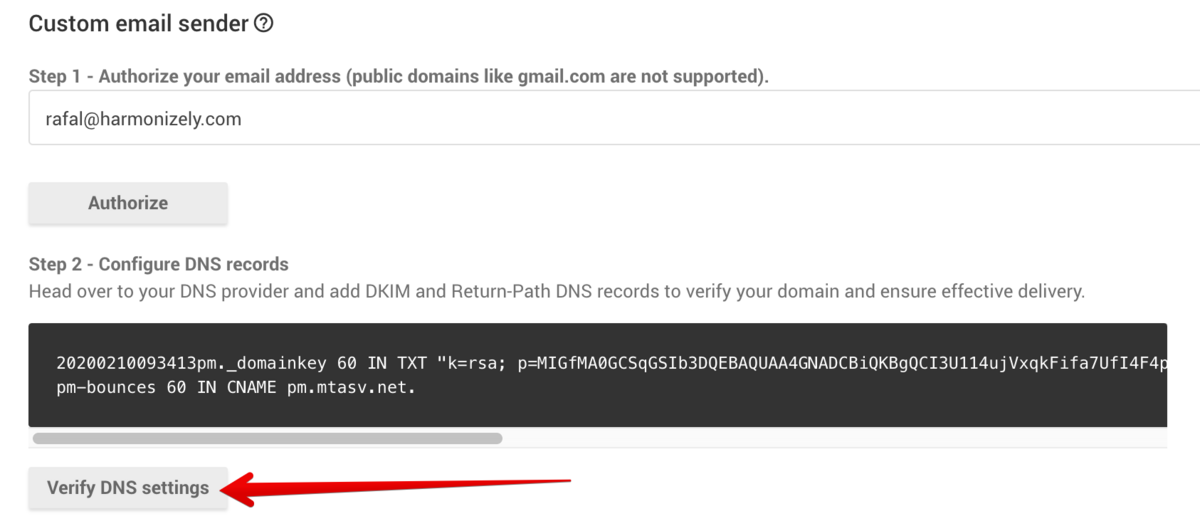
6. Click the Verify DNS settings button.
It might take up to 24h to activate your custom email address.
Are you using Cloudflare?
Proxy status for both of the DNS records must be set to DNS only.


