From SimplyMeet.me
Created page with "<p class="intercom-align-left"> Follow the steps below to change your scheduling page link. </p> <ol> <li>Click the <strong>Account Settings</strong> link on the left side o..." |
No edit summary |
||
| (2 intermediate revisions by the same user not shown) | |||
| Line 2: | Line 2: | ||
Follow the steps below to change your scheduling page link. | Follow the steps below to change your scheduling page link. | ||
</p> | </p> | ||
< | <p class="intercom-align-left"> | ||
1. Click the <strong>Account Settings</strong> link on the left side of your dashboard. | |||
</ | </p> | ||
<div class="intercom-container intercom-align-left"> | <div class="intercom-container intercom-align-left"> | ||
[[File: | [[File:Sm website address change new.png|1200px|center|link=https://help.simplymeet.me/images/5/5a/Sm_website_address_change_new.png]] | ||
</div> | </div> | ||
<p class="intercom-align-left"> | <p class="intercom-align-left"> | ||
2. Rename your Link and click <strong>Save</strong>. | |||
</p> | </p> | ||
<div class="intercom-container intercom-align-left"> | <div class="intercom-container intercom-align-left"> | ||
</div> | </div> | ||
Latest revision as of 13:40, 10 March 2025
Follow the steps below to change your scheduling page link.
1. Click the Account Settings link on the left side of your dashboard.
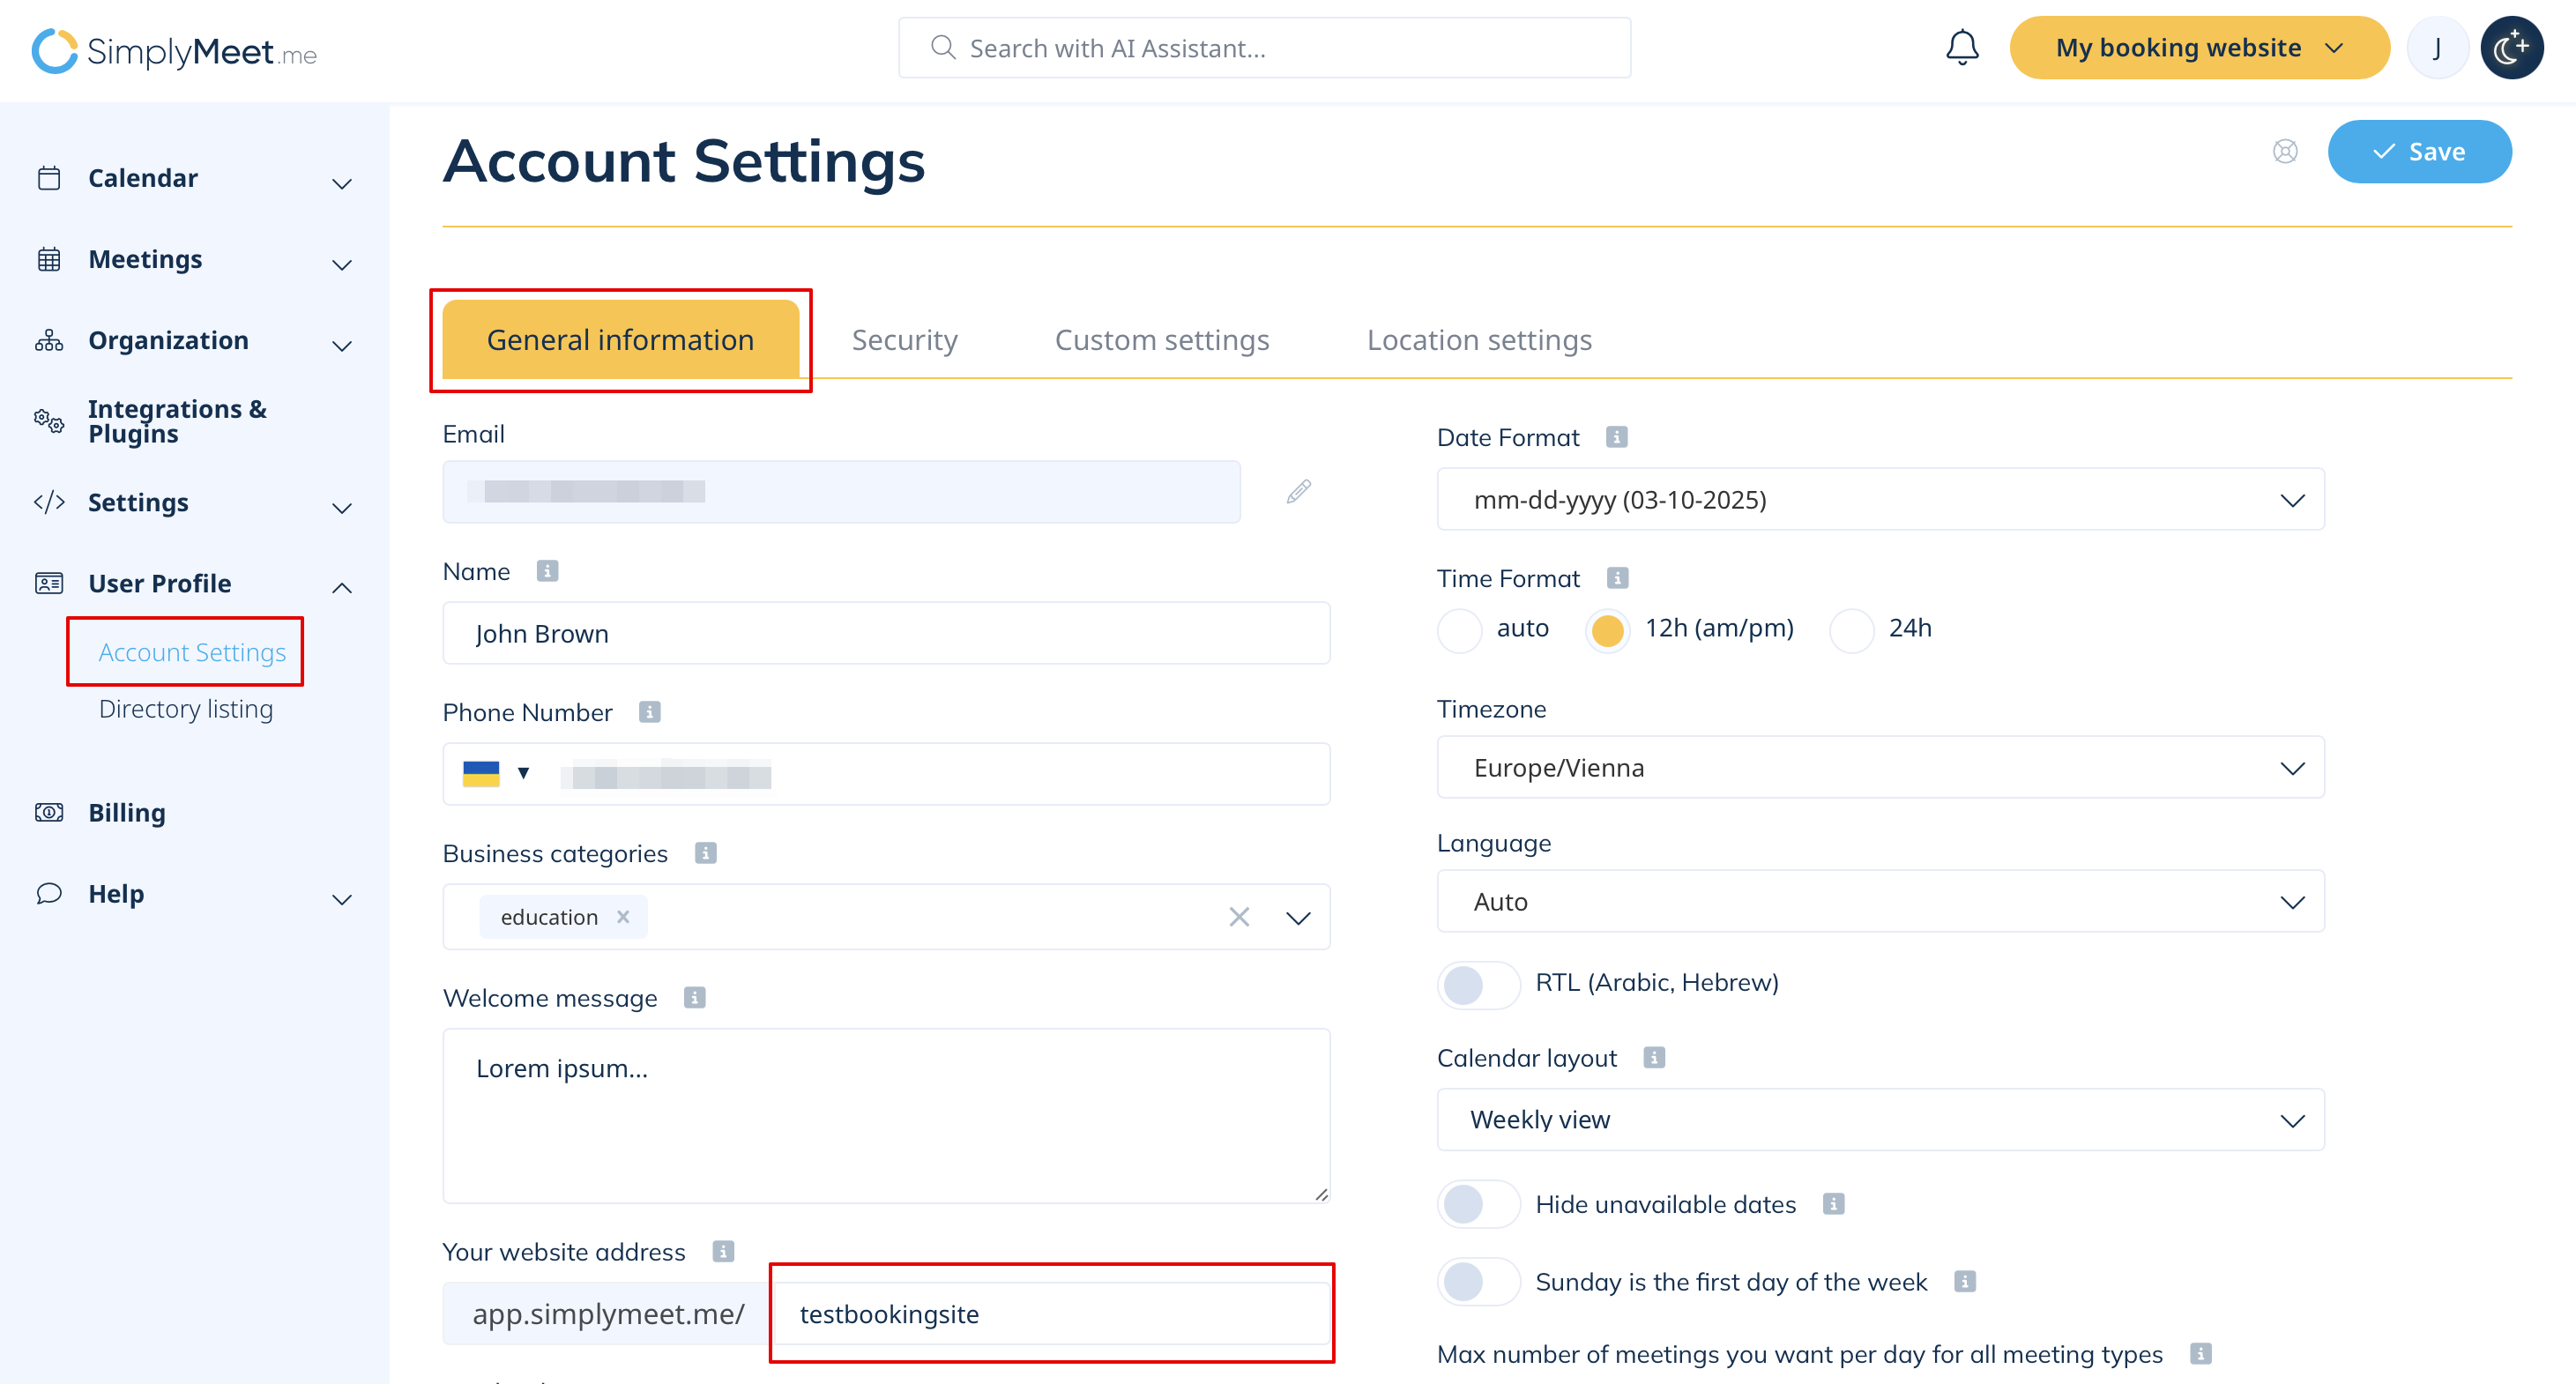
2. Rename your Link and click Save.